
There’s a certain magic to a well-used fishing rod. It’s not just a tool; it’s a repository of memories – the screaming drag of a trophy fish, the quiet contemplation on a serene lake, the shared laughter with friends. But even the most cherished rods can show their age, and often, the first part to go is the handle. Worn cork, cracked EVA foam, or a loose grip can quickly turn a pleasurable angling experience into an uncomfortable chore.
Don’t relegate your old faithful to the back of the closet just yet! Replacing a fishing rod handle is a surprisingly satisfying and achievable DIY project that can breathe new life into your beloved rod, saving you money and preserving those invaluable memories. This comprehensive guide will walk you through every step of the process, ensuring a smooth, successful, and durable repair.
Why Replace Your Fishing Rod Handle?
Before we dive into the “how-to,” let’s consider the “why.” Beyond simple wear and tear, several factors might prompt a handle replacement:
- Comfort: A degraded handle can cause blisters, hand fatigue, and an overall uncomfortable fishing experience. A fresh, ergonomic handle improves your grip and reduces strain.
- Performance: A secure handle provides better sensitivity, allowing you to feel subtle bites and better control your lure or bait. A loose handle can deaden the feel and hinder casting accuracy.
- Aesthetics: Let’s face it, a good-looking rod enhances the overall fishing experience. A new handle can dramatically improve your rod’s appearance, making it feel brand new.
- Customization: Replacing the handle offers an opportunity to upgrade to a different material (e.g., from cork to EVA or vice-versa), choose a different length, or even experiment with custom shapes for a personalized feel.
- Cost-Effectiveness: Replacing a handle is significantly cheaper than buying a new high-quality fishing rod.
- Sustainability: Repairing your existing gear is an eco-friendly choice, reducing waste and extending the life of your equipment.
What You’ll Need: Tools and Materials
Before you begin, gather all your supplies. Having everything at hand will make the process much smoother.
Essential Tools:
- Sharp Utility Knife or Razor Blade: For carefully cutting and scoring the old handle material.
- Heat Gun (Optional, but Recommended): Great for softening glues, especially with EVA foam handles, making removal easier. Be cautious not to overheat the blank.
- Hacksaw or Coping Saw: For cutting through mandrels or stubborn sections of the old handle.
- Sandpaper (Various Grits: 80, 150, 220): For cleaning the blank and shaping the new handle components.
- Denatured Alcohol or Acetone: For cleaning the rod blank thoroughly.
- Mixing Sticks and Small Cups: For epoxy preparation.
- Gloves: To protect your hands from epoxy and debris.
- Masking Tape: For masking off areas you don’t want epoxy on and for precise alignment.
- Measuring Tape or Ruler: For accurate measurements.
- Rod Building Jig or V-Blocks (Optional, but Recommended): To hold the rod steady while working.
Materials:
- New Handle Components: This typically includes:
- Grip Material: Cork rings, pre-formed cork grip, or EVA foam grip.
- Reel Seat: Choose a size and style compatible with your rod and reel.
- Winding Checks/Trims: Decorative rings that transition between components.
- Butt Cap: The end piece of the handle.
- Rod Building Epoxy (2-part, slow cure is ideal): Look for epoxies specifically designed for rod building, as they offer excellent adhesion and flexibility.
- Arbor Material (Optional, but often necessary): If your new handle components have an internal diameter larger than your rod blank, you’ll need arbor material to build up the blank’s diameter. Common arbor materials include:
- Masking Tape: Applied in layers.
- Graphite Arbors: Pre-formed tubes that can be reamed to fit.
- Urethane Arbors: Similar to graphite, but often more forgiving to ream.
Step-by-Step Guide: Replacing Your Fishing Rod Handle
The process can be broken down into several manageable stages. Take your time with each step for the best results.
Stage 1: Removing the Old Handle
This is often the most labor-intensive part, but careful removal is key to preserving your rod blank.
- Protect Your Blank: Before cutting, tape off the areas of the rod blank directly adjacent to the handle components to prevent accidental scratches.
- Cut the Old Handle:
- Cork Handles: Use a sharp utility knife to carefully make several longitudinal cuts along the length of the cork grip. Avoid cutting too deep into the blank. Once scored, you can often peel or pry away sections of the cork.
- EVA Foam Handles: A heat gun can be incredibly helpful here. Gently heat sections of the EVA foam, being careful not to scorch it or the blank. The heat will soften the adhesive, making it easier to peel away. Once soft, you can use the utility knife to make cuts and then peel the foam off.
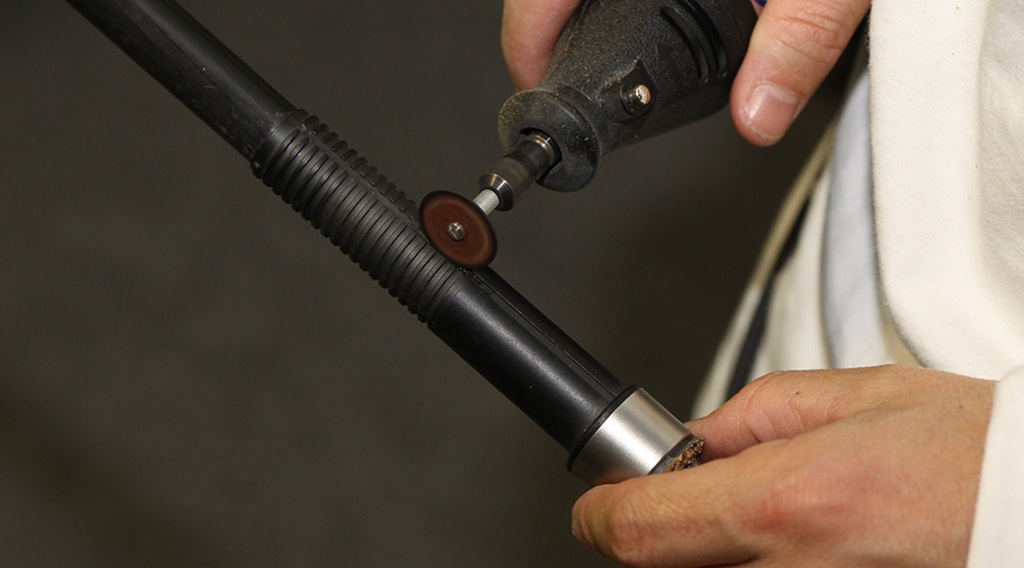
- Reel Seat: This can be trickier. Often, the reel seat is glued directly to the blank or to an arbor. Make longitudinal cuts down the reel seat. You might need to use a hacksaw to cut through the barrel of the reel seat if it’s very stubborn, always being mindful of the blank underneath. You can also try to heat it gently.
- Winding Checks/Butt Cap: These are usually glued on. You may need to cut or pry them off carefully.
- Clean the Blank: Once all the old handle material is removed, you’ll likely find old epoxy and residue. Use sandpaper (starting with 80-grit, then moving to finer grits) to carefully sand away all traces of adhesive. Follow up with denatured alcohol or acetone on a rag to thoroughly clean the blank. The goal is a smooth, clean surface ready for new adhesive.
Stage 2: Fitting the New Handle Components
This is a crucial stage where you ensure everything fits perfectly before gluing.
- Measure and Mark: Use your measuring tape to mark the desired locations for your new handle components on the rod blank. This includes the butt cap, the end of the grip, and the reel seat.
- Test Fit Components:
- Reel Seat: Slide the reel seat onto the blank. If it’s too loose, you’ll need arbor material.
- Grip (Cork or EVA): Slide the grip onto the blank. If using individual cork rings, slide them on in the order you plan to assemble them.
- Winding Checks/Butt Cap: Test fit these as well.
- Building Arbors (If Necessary):
- Masking Tape Arbors: If the component is only slightly loose, you can build up the blank with masking tape. Wrap layers of masking tape evenly around the blank until the component fits snugly. Aim for a tight, but not forced, fit.
- Graphite or Urethane Arbors: If the component is significantly larger than the blank, pre-formed arbors are a better choice. Slide the arbor onto the blank. If it’s too tight, use a reamer (a tapered tool) to enlarge the inner diameter of the arbor until it slides onto the blank with a snug fit. Then, slide your handle component over the arbor.
- Confirm Alignment: Once everything is test-fitted, ensure the reel seat is perfectly aligned with the spine of the rod (if your rod has one, which most do for optimal performance and casting). The spine is the stiffest part of the blank; typically, you’ll want your reel seat aligned with it for consistent performance. To find the spine, gently flex the blank in your hands and feel for the natural bend.
Related: The Ultimate Guide to Rod Holders for Inflatable Boats: Boost Your Fishing Game Today
Stage 3: Gluing and Assembly
Now it’s time to permanently attach the new handle components. Work in a well-ventilated area.
- Prepare Epoxy: Mix a small batch of 2-part rod building epoxy according to the manufacturer’s instructions. A 1:1 ratio is common. Mix thoroughly until no streaks remain. Take your time; slow-cure epoxy gives you more working time.
- Apply Epoxy:
- Butt Cap: Apply a thin, even coat of epoxy to the inside of the butt cap and the end of the rod blank. Slide the butt cap into place, ensuring it’s flush.
- Grip (Pre-formed or Cork Rings): Apply epoxy to the inside of the grip or to the rod blank where the grip will sit. If using cork rings, apply epoxy to one side of each ring and slide them onto the blank, pressing them together firmly to ensure no gaps. Wipe away any excess epoxy as you go.
- Reel Seat: Apply epoxy to the inside of the reel seat, especially on any arbors you’ve used. Slide the reel seat into its final position. Crucially, ensure the reel seat is perfectly aligned with the rod’s spine before the epoxy sets.
- Winding Checks: Apply epoxy to the inside of the winding checks and slide them into place.
- Clean Up Excess Epoxy: Immediately wipe away any squeezed-out epoxy with a paper towel dampened with denatured alcohol. Once epoxy cures, it’s very difficult to remove.
- Curing: Allow the epoxy to cure completely according to the manufacturer’s instructions. This can take anywhere from 12 to 24 hours, or even longer for slow-cure epoxies. Do not disturb the rod during this time. A rod building jig or V-blocks are excellent for holding the rod steady during curing.
Tips for Success and Common Pitfalls
- Patience is a Virtue: Don’t rush any step, especially the removal and curing stages.
- Cleanliness is Key: A clean blank and clean hands will ensure optimal adhesion and a professional finish.
- Less is More with Epoxy: Too much epoxy can create a mess and add unnecessary weight. Apply just enough to get full coverage.
- Ventilation: Work in a well-ventilated area when using epoxy.
- Protect Your Rod Guides: Be mindful of your rod guides when working, especially during the removal stage, to avoid bending or damaging them.
- Consider a Rod Building Kit: If this is your first time, a pre-packaged handle replacement kit can simplify component selection.
- Measure Twice, Cut Once: This old adage applies perfectly to rod building. Double-check all measurements before making cuts or applying epoxy.
- Finding the Spine: If you’re unsure about finding the rod’s spine, there are numerous videos and articles online that demonstrate the technique. It’s a subtle but important detail for optimal rod performance.
- Don’t Over-ream: When reaming arbors, work slowly and test the fit frequently. You can always remove more material, but you can’t put it back!
Related: Space-Saving Rod Holder Solutions: The Ultimate Guide for Fishing Gear Shops
The Reward: A Refurbished Masterpiece
Once the epoxy has fully cured, your fishing rod will feel like new, or perhaps even better than new if you’ve upgraded the handle components. You’ll have the satisfaction of knowing you’ve extended the life of a valuable piece of gear and, more importantly, preserved a vessel for countless future fishing memories.
So, next time your favorite rod’s handle starts to feel a bit rough, don’t despair. Embrace the DIY spirit, follow these steps, and get ready to cast with renewed comfort and confidence. Happy fishing!