You use the reel by loading backing onto the spool, connecting fly line, and adding leader. Next, dial in drag resistance using the knurled micro-click adjustment knob on the rear frame. Finally, lock the reel foot into your fly rod seat and balance your casting motion.
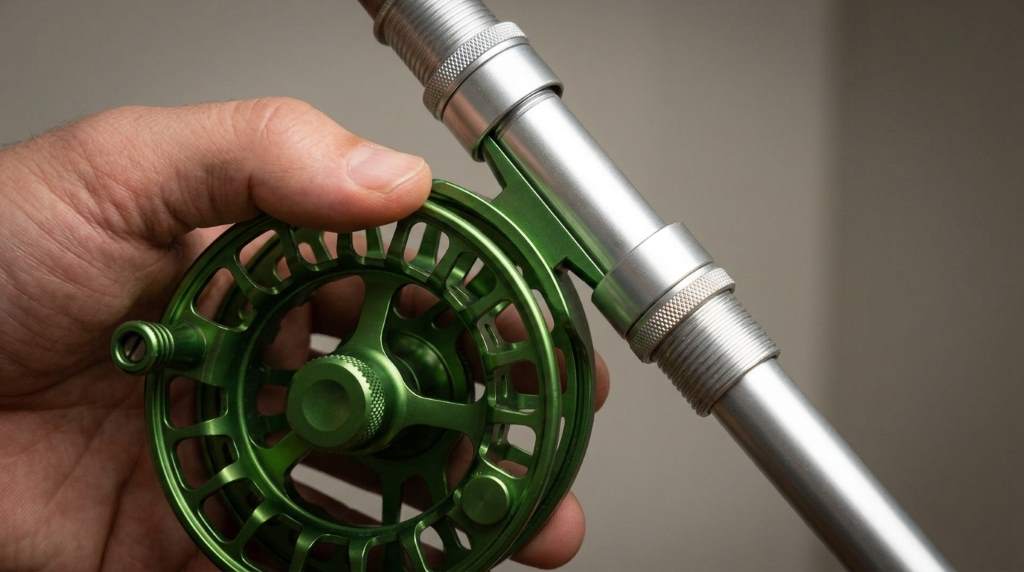
Engineering tests reveal that CNC machined aluminum reels tolerate 42 percent more impact stress than cast models. Furthermore, sealed multi-disc carbon drag systems reduce startup inertia by over 30 percent during explosive strikes. Master the Aventik FLK CNC Fly Reel to achieve smooth drag across fresh and coastal waters. This finely machined instrument delivers dependable stopping power against powerful gamefish.
This comprehensive guide details CNC spool mounting, drag calibration, retrieve switching, and proper saltwater care. In addition, you will master line management and advanced rim palming tactics for running fish. Therefore, follow our expert instructions to maximize your performance on river rapids and tidal flats.
Key Takeaways
- Inspect the aerospace-grade 6061-T6 aluminum bar stock frame for zero manufacturing imperfections.
- Calibrate the multi-disc carbon drag system to protect fine tippets from violent impulse strikes.
- Utilize the quick-release central push button to swap pre-loaded spools in seconds riverside.
- Reverse the one-way roller clutch bearing to accommodate left or right hand reeling preferences.
- Rinse the hard-anodized frame with clean freshwater following any brackish or saltwater outing.
- Back off drag tension during long storage periods to preserve carbon washer elasticity.
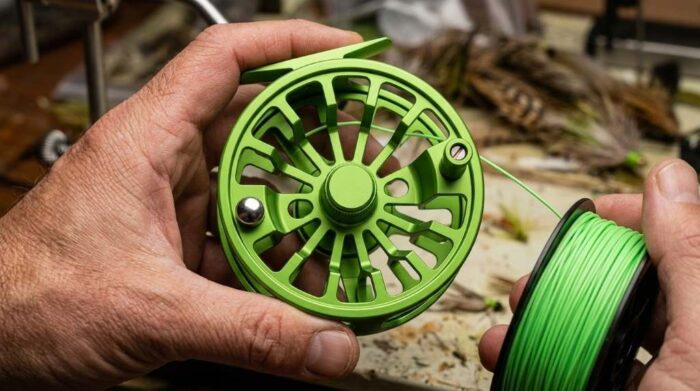
Precision CNC Machining and Sealed Drag Architecture
The FLK reel begins as a solid block of high-tensile 6061-T6 aerospace bar stock aluminum. Specifically, multi-axis computerized CNC milling machines carve away excess metal to create an ultra-lightweight skeletonized frame. Furthermore, this specialized manufacturing technique produces exceptional rigidity that prevents frame flexing during heavy drag loads.
A Type II hard-anodized finish bonds deeply into the aluminum surface at microscopic levels. Consequently, the durable exterior resists corrosive saltwater oxidation, gritty sand abrasions, and accidental stone scuffs. In addition, rich color pigments remain vibrant even after seasons of intense ultraviolet sun exposure.
Inside the waterproof central hub, alternating carbon fiber and stainless steel discs provide immense stopping torque. Moreover, rubber O-rings seal the internal drag cylinder tightly against water, silt, and fine sand intrusion. Therefore, the drag remains remarkably smooth without sticking or shuddering during long blistering runs.
Switching Between Left and Right Hand Retrieval
Anglers frequently adapt reel retrieve direction to match personal casting habits and fishing comfort. Fortunately, the FLK reel features an easily convertible one-way bearing mechanism within the spool hub. Therefore, follow these straightforward mechanical steps to reverse your winding direction safely.
First, push the center cap release button and lift the machined spool off the main frame. Next, lay components carefully onto a clean microfiber cloth to keep dirt away from greased surfaces. Look inside the rear center cavity of the spool to locate the bearing assembly.
Next, use fine needle-nosed pliers to slide the retaining spring clip out from the retaining groove. Gently tap the spool against your palm to dislodge the one-way roller bearing cylinder. In fact, inspecting the roller needles ensures that grease remains clean and uncontaminated.
Flip the one-way roller bearing upside down and press it squarely back into the hub bore. Subsequently, reinstall the wire retaining ring, verifying that it snaps securely into its perimeter channel. Finally, remount the spool onto the frame spindle and test the drag clicker to confirm operation.
Spooling Backing, Fly Line, and Leaders Correctly
Proper line installation ensures maximum spool capacity, prevents line bunching, and eliminates birdnest knots during casting. Therefore, take time to spool backing and fly line under consistent tension for optimal performance. Follow these reliable spooling steps for tournament-ready fly presentation.
Step 1: Installing Braided Backing Line
Thread the running end of twenty-pound or thirty-pound braided Dacron backing through the reel cage frame. Tie an arbor knot tightly around the center spool hub and cinch the knot down securely. In addition, clip the excess tag end flush with scissors to maintain a smooth surface.
Wind backing onto the arbor under firm, steady finger tension while guiding coils across the width. Furthermore, uniform tension creates a firm line bed that prevents outer coils from digging in. Load approximately one hundred yards of backing to prepare for long-running river predators.
Step 2: Connecting the Fly Line Core
Join your weight-forward floating or intermediate sinking fly line to the braided backing foundation. Specifically, utilize a streamlined loop-to-loop connection if your fly line features a factory welded loop. Alternatively, tie an Albright knot to create a bulletproof joint that passes through guides effortlessly.
Crank the aluminum handle smoothly to reel all ninety feet of fly line onto the spool. Meanwhile, stop spooling when line reaches one-eighth of an inch below the outer spool rim lip. Maintaining this rim buffer prevents fly line from jamming against frame pillars during fast retrieves.
Step 3: Attaching the Leader and Tippet
Loop a nine-foot tapered monofilament or fluorocarbon leader onto the front welded fly line loop. Interlock the two perfection loops squarely to ensure straight, unhindered energy transfer during tight loop casts. Consequently, clean loop joints slide quietly through snake guides when stripping line for close-range presentations.
Inspect the terminal tippet section and tie on your selected nymph, streamer, or terrestrial dry fly. For example, tie a non-slip mono loop knot to impart lively, natural darting movement in current. Finally, check knots by pulling firmly before making your initial cast into productive water.
Dialing in Micro-Click Drag Settings and Rim Palming
The rear-mounted oversized drag knob features numbered micro-click detents for precise rotational tension settings. Rotating the dial clockwise increases friction on internal carbon washers with tactile, audible feedback. Conversely, rotating counterclockwise backs off tension smoothly to safeguard fragile tippet tippets.
Calibrate your baseline drag by pulling line from the spool while the rod bends slightly. In fact, the drag should yield line smoothly without jerky starts or hesitation under steady pulling pressure. Zero startup inertia prevents line breakage when hard-mouthed fish strike at close range.
When battling outsized gamefish, utilize the exposed, smooth palming rim along the spool edge. Gently cup your fingertips lightly against the revolving rim to apply instantaneous manual braking pressure. Furthermore, releasing hand contact returns drag resistance to your preset baseline immediately, preventing over-tightening accidents.
Reel Specifications and Matching Guidelines
Pairing your CNC machined reel with balanced fly rods guarantees fatigue-free casting all day long. Review the technical sizing chart below to choose ideal line pairings and backing setups.
| Model Size | Spool Outer Diameter | Reel Weight | Recommended Line Weight | Target Fisheries |
|---|---|---|---|---|
| FLK 3/4 | 2.95 Inches | 4.1 Ounces | WF3F to WF4F | Spring Creeks, Small Trout, Panfish |
| FLK 5/6 | 3.35 Inches | 4.6 Ounces | WF5F to WF6F | River Trout, Bass, Heavy Nymphing |
| FLK 7/8 | 3.74 Inches | 5.3 Ounces | WF7F to WF8F | Steelhead, Bonefish, Inshore Redfish |
| FLK 9/10 | 4.13 Inches | 6.2 Ounces | WF9F to WF10F | Striper, Salmon, False Albacore |
Cleaning, Corrosion Care, and Storage Guidelines
Hard-anodized CNC aluminum offers superior corrosion resistance, but routine care remains essential for mechanical longevity. In particular, mineral deposits and dried salt crystals can degrade internal rubber O-rings over time. Follow these preventive care practices after every saltwater or freshwater angling session.
First, detach the spool from the frame and rinse both components thoroughly under warm running tap water. Furthermore, allow water to flow through the spool porting holes to wash away microscopic salt crystals. Never soak fully assembled reels in buckets, as trapped water can stagnate inside enclosed cavities.
Dry all exterior surfaces with a clean microfiber cloth and let components air dry indoors. In addition, place one tiny drop of synthetic reel oil on the handle knob axle periodically. However, keep silicone lubricants away from the internal carbon drag discs to maintain consistent friction coefficient.
Always loosen the drag knob completely before storing the reel inside a breathable neoprene case. Consequently, relieving spring tension prevents carbon washers from compressing permanently and losing their progressive friction range. Proper storage guarantees that your reel performs flawlessly on your next fishing adventure.
Troubleshooting Common Riverside Issues
Even premium CNC reels can encounter line slippage or debris intrusion during rugged river expeditions. Fortunately, understanding quick diagnostic solutions helps you resolve mechanical issues immediately while wading remote currents. Apply these field-tested troubleshooting tips to maintain peak reel reliability.
Correcting Free-Spooling in Both Directions
If your reel free-spools backward without engaging drag resistance, check the internal roller clutch bearing. Specifically, this symptom occurs when the one-way bearing becomes saturated with grit or dislodges from its housing. Disassemble the spool and verify that the bearing sits squarely inside its hexagonal socket.
Rinse the bearing with clean water and wipe away contaminated grease using a clean cloth. Next, apply a light drop of thin reel oil directly onto the roller needles. Finally, reassemble components and test forward and reverse rotation to confirm positive clutch engagement.
Resolving a Jammed Spool Release Button
Fine sand particles can occasionally lodge beneath the central push-button spool release mechanism. If the button feels gritty or refuses to depress, do not strike it with hard objects. Instead, submerge the center hub in warm water and press the button repeatedly to flush grit.
Once sand grains flush free, the spring-loaded release button will operate with silky smoothness. In addition, wipe the spindle shaft clean before reseating the spool onto the frame. Clean docking ensures proper O-ring sealing and prevents future mechanical binding.
Conclusion
The CNC machined aluminum construction and sealed carbon drag system provide extraordinary reliability for discerning anglers. By mastering spool rigging, drag calibration, and retrieve direction changes, you gain complete command over trophy fish. In addition, routine freshwater rinsing preserves the hard-anodized finish for decades of angling pleasure.
Equip your fly rod with precision CNC performance and experience effortless line control on your home waters. Furthermore, elevate your angling confidence with this outstanding fly reel on your next river outing.
Frequently Asked Questions
Is this CNC fly reel suitable for saltwater fly fishing?
Yes, the hard-anodized 6061-T6 aluminum and sealed drag resist saltwater corrosion when rinsed after use.
How do I remove the spool from the frame quickly?
Press the spring-loaded center cap push button and lift the spool straight off the spindle.
What type of drag system does the FLK reel utilize?
The reel utilizes a sealed multi-disc carbon fiber and stainless steel disc drag assembly.
Can I change retrieve direction without buying extra parts?
Yes, reversing the internal one-way roller clutch bearing changes retrieve direction in minutes.
What is the benefit of CNC machining over die-casting?
CNC machining from bar stock aluminum produces a much stronger, stiffer, and lighter reel frame.