
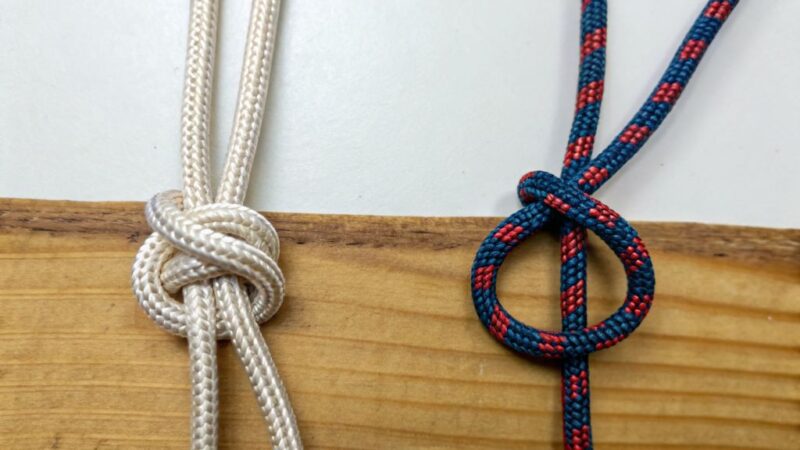
The hum of a reel, the cast arcing through the air, the anticipation of a bite – these are the moments that define fishing. But between you and that potential trophy catch lies a critical link: your fishing knot. A failed knot can turn triumph into heartbreak in an instant. When considering clinch knot vs palomar , among the countless knots available to anglers, two stand out as perennial favorites: the Clinch Knot (often the Improved Clinch) and the Palomar Knot. Both are widely used, relatively easy to learn, and generally reliable. But when faced with the choice, which one should you trust your line, lure, and potentially your personal best catch to?
The truth is, there’s no single “best” knot for every situation. The optimal choice often depends on factors like your line type, the size of your hook or lure, and even your personal dexterity and confidence. This article will dive deep into the world of the Clinch and Palomar knots, breaking down their strengths, weaknesses, and ideal applications to help you make an informed decision and tie the right knot for your fishing adventure.
Understanding the Contenders: A Closer Look
Before we pit them head-to-head, let’s get acquainted with each knot individually.
The Clinch Knot (and its Improved Sibling)
The basic Clinch Knot is one of the first knots many anglers learn. It’s straightforward, quick to tie, and effective for connecting fishing line to a swivel, lure, or hook eye. However, the basic Clinch Knot has a known tendency to slip, especially with certain modern lines. This led to the development of its much more reliable cousin: the Improved Clinch Knot. When most anglers refer to the “Clinch Knot” in a fishing context, they are almost always talking about the Improved Clinch.
How to Tie the Improved Clinch Knot:
- Pass the tag end of your line through the eye of the hook, swivel, or lure.
- Double back and make five to seven twists around the standing line. For heavier lines (20 lb test or more), fewer twists (3-5) may suffice.
- Pass the tag end back through the first loop created just above the eye.
- Now, and this is the “improved” part, pass the tag end through the large loop you just created.
- Wet the knot with saliva or water to lubricate it (this reduces friction and heat build-up, which can weaken the line).
- Hold the standing line and the hook/lure and pull the tag end slowly and firmly to tighten the knot, ensuring the coils cinch down neatly.
- Trim the tag end, leaving about 1/8 to 1/4 inch.
Pros of the Improved Clinch Knot:
- Relatively Easy to Learn: The steps are intuitive and can be mastered with a little practice.
- Quick to Tie: Once you’re proficient, you can tie this knot rapidly, which is great when the bite is hot.
- Compact: It forms a relatively small knot profile, which can be less visible to fish and less prone to snagging weeds or debris.
- Good for Monofilament and Fluorocarbon: It performs well and retains a good percentage of the line’s original strength with these line types.
- Doesn’t Require Passing the Object Back Through: Unlike the Palomar, you don’t need to pass the entire hook or lure back through a loop, making it easier with larger tackle.
Cons of the Improved Clinch Knot:
- Can Weaken with Braided Line: Braided line is slippery and less elastic than mono or fluoro. The Improved Clinch can slip or cut into itself under heavy pressure when used with braid, leading to reduced knot strength.
- Consistency: If the twists aren’t neat, or the tag end isn’t properly passed through both loops, the knot strength can be compromised.
- Slightly Less Strong Than Palomar (Generally): While strong, it often tests slightly weaker than a properly tied Palomar knot, particularly with lines known for knot-slippage.
The Palomar Knot
The Palomar Knot has earned a reputation as one of the strongest and most reliable fishing knots available, especially among anglers who favour braided line. Its design distributes stress effectively, minimizing the chance of the knot slipping or cutting the line.
How to Tie the Palomar Knot:
- Double about 6 inches of your line and pass the loop through the eye of the hook, swivel, or lure.
- Tie a simple overhand knot with the doubled line, letting the hook/lure hang loose. Do not tighten this overhand knot.
- Bring the loop you created down and pass it completely over the hook, swivel, or lure. Ensure the loop clears the object.
- Slide the loop up the standing line.
- Wet the knot thoroughly with saliva or water.
- Hold the standing line and the tag ends, and pull the hook/lure down while sliding the knot into place just above the eye.
- Pull everything tight, ensuring the knot seats neatly.
- Trim the tag end close to the knot.
Pros of the Palomar Knot:
- Exceptional Strength: Known for consistently high knot strength and reliability, often retaining a very high percentage of the line’s breaking strength.
- Excellent for Braided Line: This is its standout feature. The Palomar’s structure handles the slippery nature of braid exceptionally well, making it a go-to knot for many braid users.
- Reliable with Mono and Fluoro: While particularly good for braid, it also performs very well with monofilament and fluorocarbon lines.
- Simple Concept: Although step 3 might seem a bit awkward initially, the basic idea of an overhand knot with a loop passed over is quite simple.
Cons of the Palomar Knot:
- Can Be Bulky: The doubled line and the way it cinches can result in a slightly larger knot profile compared to the Improved Clinch.
- Difficult with Large Tackle: Passing the entire hook or lure back through the loop (step 3) can be challenging, if not impossible, with very large hooks, bulky lures, or treble hooks.
- Uses More Line: Doubling the line requires using slightly more line per knot compared to the Improved Clinch.
Head-to-Head: Clinch vs. Palomar – Which is “Best”?
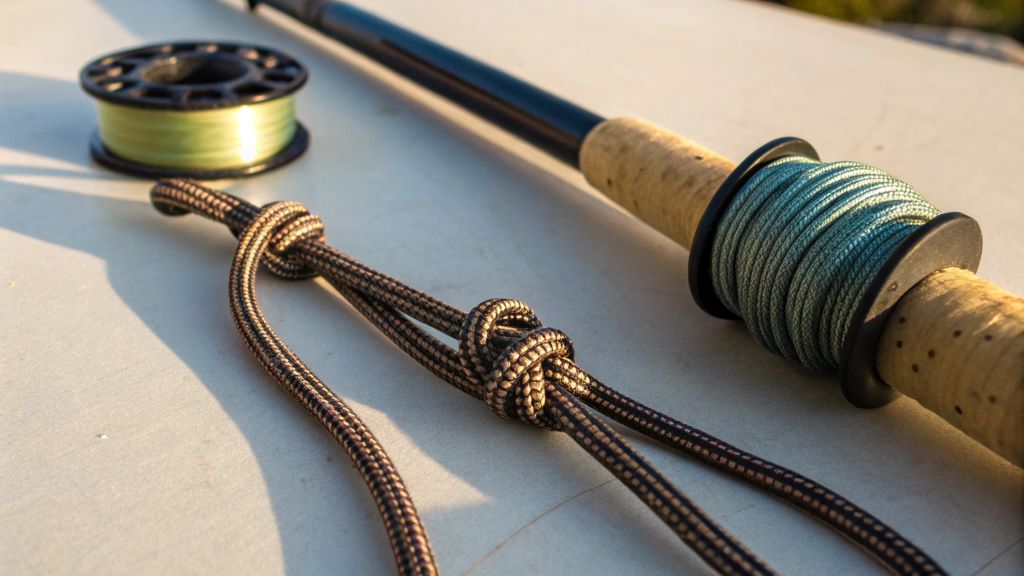
Now that we’ve examined each knot individually, let’s put them side-by-side based on key performance indicators:
-
Strength and Reliability:
- Palomar Wins (Generally): In most head-to-head tests, a properly tied Palomar knot will exhibit higher breaking strength and reliability, especially when using braided line. Its design is inherently more resistant to slipping under pressure.
- Improved Clinch is Strong (But Less Consistent with Braid): For monofilament and fluorocarbon, the Improved Clinch is very strong and reliable when tied correctly. However, its performance drops significantly with braided line due to slippage issues.
-
Line Type Compatibility:
- Palomar is More Versatile: Excellent with braid, and very good with mono/fluoro.
- Improved Clinch is Best for Mono/Fluoro: While it can be used with braid in a pinch (perhaps with extra turns), it’s not the ideal choice for this line type if maximum strength is needed.
-
Ease of Tying:
- Improved Clinch Can Be Faster for Some: Many find the Improved Clinch slightly quicker to tie once proficient, especially the initial steps.
- Palomar Has the “Loop Over” Hurdle: The step of passing the lure/hook back through the loop can be awkward, particularly in cold weather, low light, or with large tackle.
-
Bulk:
- Improved Clinch is Less Bulky: Generally forms a smaller, more streamlined knot.
- Palomar is Slightly Bulkier: The doubled line contributes to a slightly larger knot profile.
-
Suitability for Different Tackle:
- Improved Clinch is Better for Large/Bulky Tackle: Since you don’t need to pass the object through a loop, it’s easier to use with large hooks, big lures, or multiple treble hooks.
- Palomar Can Be Difficult with Large Tackle: The loop-over step is the limiting factor here.
Situational Recommendations: Choosing Your Knot
Based on the comparison, here’s a guide to help you choose:
- You’re using Braided Line: Choose the Palomar Knot. This is where the Palomar truly shines and is widely considered the superior knot for braid due to its strength and resistance to slippage.
- You’re using Monofilament or Fluorocarbon Line: Both knots are viable.
- For maximum strength and reliability, particularly with heavier mono/fluoro: The Palomar is often still the top choice.
- For speed, ease of tying with large tackle, or minimal bulk: The Improved Clinch is an excellent and reliable option. Ensure you tie it correctly with enough twists and wet the knot thoroughly.
- You are Tying to a Swivel, Snap, or Split Ring: Both knots work well. Consider line type as the primary factor.
- You are Tying Directly to a Hook Eye: Both work. Again, line type is key. If using a very large hook, the Improved Clinch might be easier.
- You are in a Situation Requiring Speed (e.g., Hot Bite): If proficient, both can be tied quickly. Some find the Improved Clinch slightly faster initially.
- You are Fishing in Cold Weather or Have Limited Dexterity: The knot you can tie correctly under these conditions is the best one. Practice both!
Beyond the Tie: Essential Knot Tying Best Practices
Regardless of whether you choose the Clinch or the Palomar, the way you tie the knot is just as important as the knot itself. Poorly tied knots are weak knots. Here are some universal best practices:
- Lubricate Your Knot: Always wet the line before cinching down the knot. Saliva or water reduces friction and prevents the line from weakening due to heat generated during tightening. This is crucial for all line types, especially fluorocarbon.
- Cinch Slowly and Firmly: Don’t just yank the knot tight. Pull steadily and firmly, watching the coils seat neatly against the eye. Ensure the knot is properly formed before applying full pressure.
- Trim the Tag End Properly: Leave a small tag end (1/8 to 1/4 inch). Trimming too close can allow the knot to unravel under pressure. Leaving too long can catch debris.
- Practice, Practice, Practice: Tie your knots at home in a comfortable environment until you can do them by feel. Don’t wait until you’re on the water with trembling hands and an incoming fish.
- Inspect Your Knots Regularly: Before casting, after catching a fish, or if you’ve been snagged, visually inspect your knot for any signs of fraying, damage, or slippage. Retie if necessary.
- Know Your Line: Understand the characteristics of the line you’re using (mono, fluoro, braid) as this significantly impacts knot performance.
Sinking Line for Deep Water Trolling: The Ultimate Guide to Targeting Deep-Sea Trolling Anglers
Conclusion: The Right Knot for the Right Time
Returning to our original question: Which knot is best? The answer, as is often the case in fishing, is nuanced: The best knot is the one you tie correctly for the specific line you are using and the fishing situation you are in.
For anglers primarily using monofilament or fluorocarbon, the Improved Clinch Knot is a fantastic, reliable, and easy-to-tie option. It will serve you well in many scenarios.
However, if you fish with braided line, or if you simply want arguably the highest possible knot strength across all line types (provided you can pass the tackle through the loop), the Palomar Knot is the undisputed champion. Its robust structure handles braid’s slipperiness better than almost any other common knot.
Ultimately, a skilled angler should strive to know both knots. Learning the Improved Clinch provides a fast, reliable option for mono/fluoro and times when tackle size is an issue. Mastering the Palomar equips you with the strongest possible connection, particularly vital when fishing with braid or targeting powerful fish.
Practice both, understand their strengths and weaknesses, and choose the one that gives you the most confidence. Because when that big fish finally bites, you want to know that the critical link between you and your quarry is as strong and reliable as possible. Good luck, and tight lines!
Read More:
How to Fix Tangled Fishing Line Mid-Cast: Expert Solutions for Anglers
What Makes Fluorocarbon Line Better for Ice Fishing: Unrivaled Secrets for Icy Success


