Fishing success depends on more than just luck. It relies on technique, knowledge, and the right gear. One of the most important — yet often overlooked — aspects of fishing is how you set up your sinkers and floats. A proper setup can dramatically improve your catch rate. A poor one can leave you waiting for hours with nothing to show for it.
In this guide, you will learn how to choose and set up sinkers and floats correctly. Whether you are a beginner or a seasoned angler, these tips will help you catch more fish on every trip.
Understanding the Role of Sinkers and Floats
Before diving into setup tips, it helps to understand what sinkers and floats actually do.
Sinkers are small weights attached to your fishing line. Their job is to pull your bait down to the right depth. Without a sinker, your bait may float near the surface. This means fish swimming deeper will never see it.
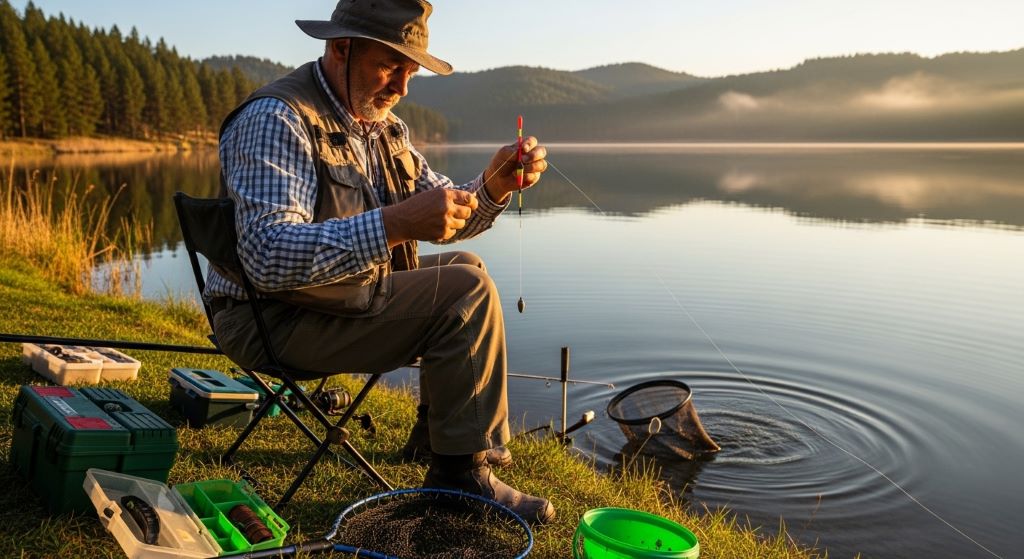
Floats, also called bobbers, do the opposite. They keep your bait at a specific depth in the water column. Additionally, floats act as bite indicators. When a fish grabs your bait, the float dips or moves. This signals you to set the hook.
Together, sinkers and floats work as a team. They place your bait where fish are feeding and tell you when a bite is happening. However, using the wrong size or type for your conditions can ruin your chances.
Choosing the Right Sinker for the Job
Not all sinkers are the same. Different shapes and sizes serve different purposes. Choosing the right one is the first step to improving your catch rate.
Split Shot Sinkers
Split shot sinkers are small, round weights with a slot cut into them. You pinch them onto your line using pliers or your fingers. They are perfect for light fishing in calm, shallow water. Additionally, they are easy to add or remove without cutting your line.
Use split shots when you are fishing in a stream, pond, or slow river. They work well with light bait like worms or small crickets.
Egg Sinkers
Egg sinkers are oval-shaped and have a hole through the center. Your line runs through this hole freely. This is a big advantage. When a fish picks up the bait, it does not feel the weight of the sinker right away. Therefore, it is less likely to drop the bait before you can set the hook.
Egg sinkers are ideal for still water fishing, like lakes and ponds. They work especially well on sandy or muddy bottoms.
Bank Sinkers
Bank sinkers have a flat shape and a molded-in loop at the top. They are designed to hold your bait in place even in strong currents. If you are fishing in a fast-moving river, a bank sinker is a great choice. Its shape prevents it from rolling along the bottom.
Pyramid Sinkers
Pyramid sinkers have a pointed tip that digs into soft sand. They are the go-to choice for surf fishing. When waves and currents push against your line, these sinkers hold firm. Therefore, your bait stays exactly where you placed it.
Choosing the Right Float
Floats come in many shapes and sizes. Each type is suited to specific conditions and fishing styles.
Round Bobbers
Round bobbers, also called clip-on bobbers, are the most common type. They are simple to attach and remove. However, they create a lot of resistance when a fish pulls the bait. This can spook cautious fish. Use them when fishing in calm water with aggressive feeders like bluegill or perch.
Slip Floats
Slip floats allow your line to pass through the float freely. You set a small stopper on the line to control depth. This design lets you cast much farther than a fixed bobber. It also makes it easier to fish at various depths. Slip floats are excellent for fishing in deeper water or when long casts are needed.
Pencil Floats
Pencil floats are long and thin. They offer very little resistance in the water. When a fish touches the bait, the pencil float reacts quickly and visibly. This makes them perfect for shy, slow-biting fish like trout or carp. Additionally, they perform well in light winds because they sit lower in the water.
Waggler Floats
Waggler floats attach only at the bottom of the float. This design reduces the effect of wind on your line. Therefore, your bait presentation stays natural even in breezy conditions. Wagglers are popular in match fishing and work beautifully in rivers with a slight current.
Setting the Right Depth
Getting your bait to the right depth is crucial. Fish feed at different levels of the water column. Some stay near the surface, while others hug the bottom.
To find the feeding zone, start by setting your float so the bait hangs just above the bottom. Slowly move the float up or down until you start getting bites. This trial-and-error method helps you locate where fish are holding on that particular day.
In warmer months, fish often move to shallower water early in the morning. Later in the day, they drop deeper to find cooler temperatures. Therefore, adjusting your depth as the day progresses can lead to significantly more bites.

Balancing Sinker Weight and Float Size
One of the most common mistakes anglers make is mismatching their sinker and float. The float must be buoyant enough to hold the sinker up while still being sensitive to bites.
A float that is too large will not dip when a small fish nibbles. A float that is too small will be pulled under by the sinker and sink before a fish even bites.
A good rule of thumb is this: the tip of the float should sit just above the waterline with your sinker attached. If the float rides too high, add a little more weight. If it sinks below the waterline, switch to a larger float or reduce your sinker size.
Additionally, always match your gear to the size of fish you are targeting. Light, sensitive setups work best for small panfish. Heavier, larger setups are better for big catfish or bass.
Line Setup Tips for Better Results
Your choice of fishing line also affects how your sinkers and floats perform.
Monofilament line is a common choice for float fishing. It is flexible, affordable, and easy to tie. However, it has some stretch. This can reduce sensitivity slightly.
Fluorocarbon line is nearly invisible underwater. It sinks faster than monofilament, which helps get your bait down quickly. Therefore, it pairs well with smaller sinkers.
Braided line has almost no stretch. This makes it very sensitive to bites. However, it floats on the water surface, which can interfere with your float’s movement. Many anglers use a fluorocarbon leader attached to braided main line for the best of both worlds.
Rigging Your Setup Correctly
Once you have chosen your sinker, float, and line, it is time to rig everything together. A clean, well-tied rig presents your bait naturally and reduces tangles.
Here is a simple float rig setup that works in most situations:
- Attach the float to your main line at the correct depth using a stopper knot or float stop.
- Thread your main line through or onto the float according to its design.
- Tie a small swivel below the float using a clinch knot.
- Attach a leader line of 12 to 24 inches to the swivel.
- Pinch one or two split shot sinkers onto the leader, about 6 to 8 inches above the hook.
- Tie your hook to the end of the leader using a palomar or improved clinch knot.
This rig works well for most freshwater fish. Additionally, it can be adapted for saltwater by using corrosion-resistant hooks and swivels.
Reading the Water for Better Placement
Even the best rig setup will not help if you are casting to the wrong spot. Learning to read the water is just as important as your gear.
Look for changes in water color. Darker areas usually indicate deeper water. Fish often congregate along depth changes, called drop-offs. Therefore, placing your rig near these areas can increase your chances.
Current seams — where fast water meets slow water — are natural feeding lanes for fish. Cast your float so the bait drifts naturally along these seams. Additionally, structures like rocks, fallen trees, and docks provide cover for fish. Casting near these features is almost always a smart choice.
Common Mistakes to Avoid
Even experienced anglers make mistakes with their sinker and float setup. Here are some to watch out for:
- Using too much weight, which causes unnatural bait movement.
- Setting the float at the wrong depth without adjusting as conditions change.
- Ignoring water current when positioning a float setup.
- Failing to balance the float and sinker properly.
- Using a damaged or waterlogged float that gives false signals.
Avoiding these mistakes will immediately improve your presentation and, therefore, your catch rate.
Conclusion
Improving your catch rate does not always mean buying expensive gear or finding secret fishing spots. Sometimes, the answer lies in something as simple as your sinker and float setup. By understanding what each component does, choosing the right type for your conditions, and balancing your rig correctly, you put yourself in a much stronger position to catch fish consistently.
Start by experimenting with the setups described in this guide. Adjust your depth, match your sinker to your float, and pay attention to where you are placing your bait. Over time, these small changes will add up to noticeably better results. Tight lines!
Frequently Asked Questions
1. What size sinker should I use for float fishing?
The right sinker size depends on your float and fishing conditions. Generally, use enough weight to keep the float barely above the waterline. In still water, a lighter sinker works fine. In strong currents, use a heavier one to keep your bait in place.
2. How deep should I set my float?
Start by setting your float so the bait is just above the bottom. Gradually adjust up or down based on where bites occur. Fish feed at different depths depending on the time of day, season, and water temperature.
3. Can I use a sinker without a float?
Yes. Bottom rigs use sinkers without floats. This method is common when targeting fish that feed on the riverbed or lakebed, such as catfish, carp, and bream. The lack of a float allows the bait to sit directly on the bottom.
4. What is the difference between a slip float and a fixed bobber?
A fixed bobber clips onto your line at a set point. A slip float allows the line to slide freely through it, with the depth controlled by a movable stopper. Slip floats allow for longer casts and work better in deeper water.
5. How do I stop my float from being pulled under by the current?
Use a larger float or reduce your sinker weight. You can also switch to a waggler-style float, which attaches only at the bottom and cuts through wind and light current more efficiently. Casting slightly upstream and letting the rig drift naturally also helps keep the float stable.
Related Topics:
How to Use the Drop Shot Rig for Success in Canadian Waters
Best Fishing Rigs in Canada: Essential Setups for Every Angler